Testing Plugins
The end-user interface for the Ezlo hub is the EZLogic website at https://ezlogic.mios.com/ This is the website you’ll use to upload, install, and test your plugin. In order to access it, you’ll need an Ezlo/Vera account. So the first step is to create an account, and log-in.
After that, you’ll be greeted with the dashboard and a sidebar on the left. 3 Tabs in specific are noteworthy:
Automation > MeshBots
This is where the end-user will use the capabilities of your plugin to create and manage custom automations.
Plugins > Edge Plugins
This is the marketplace where you can upload, install, configure, and remove plugins from your hub. Two methods of installing are available: Uploading a local file, and downloading from the marketplace. During development, you will be uploading from your local machine. When the plugin is finished, it will be uploaded to the marketplace, where the end-user will install it from.
Settings > Devices
This is where devices are displayed. These can be hubs, physical devices connected, or virtual devices created by plugins. From here, they can be manually viewed, reconfigured, and removed by the user.
For the sake of brevity, we will from now on call these “MeshBots tab”, “plugins tab”, and “devices tab”.
If you have no physical Ezlo Hub, the easiest way to start development is with Ezlo SoftHub. This is a virtual hub, which emulates a physical Ezlo Hub on your computer.
You can use the virtual hub with or without Z-Wave hardware:
- With Z-Wave Hardware – If you have Z-Wave hardware, you can just use the instructions in the community post here – https://community.ezlo.com/t/introducing-ezlo-softhub-downloadable-software-for-free/219510.
Without Z-Wave Hardware – If not, then a simple docker-compose should do the job[^1], by using the vhub docker-compose folder provided[^2] (i.e. running `sudo docker-compose up` inside the folder).
- [^1]: These instructions are, currently, Linux only.
- [^2]: Two versions were provided. An older but stable one, and a bleeding-edge but unstable one.
After that, with the vhub running, use the provision tool to link the hub to your account. The exact command is
`./provision.linux.amd64 provision --username <ACCOUNT USERNAME> --password <ACCOUNT PASSWORD> --description <SOME DESCRIPTION>`[^3].
- [^3]: You can run `./provision.linux.amd64 –help` for all the options available.
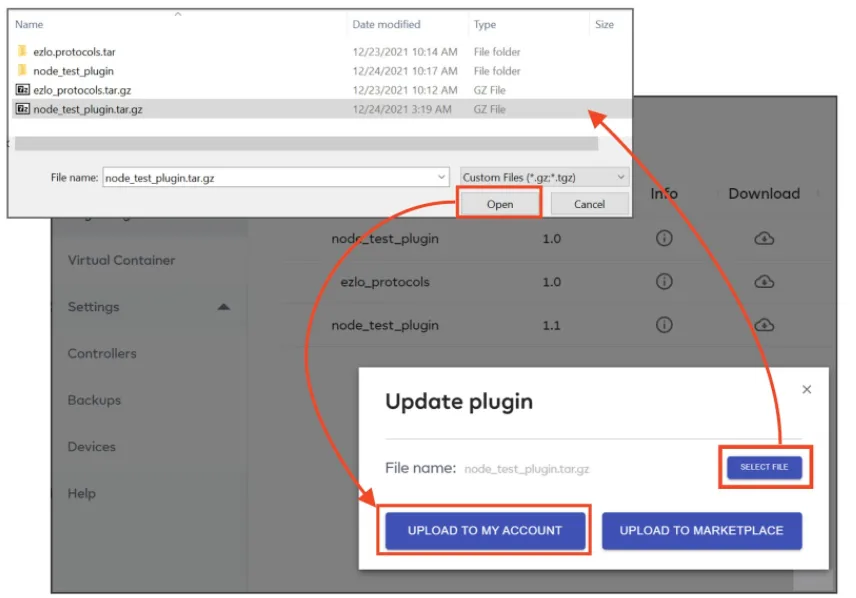
To execute your plugin, it must be uploaded to the EZLogic platform in `tar.gz` format as specified here.
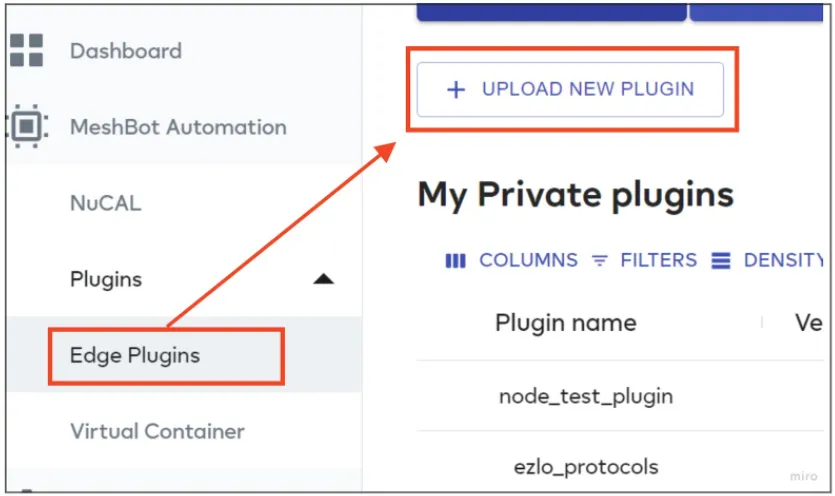
Go to the plugins tab, click on “Upload New Plugin”, and select the archive:
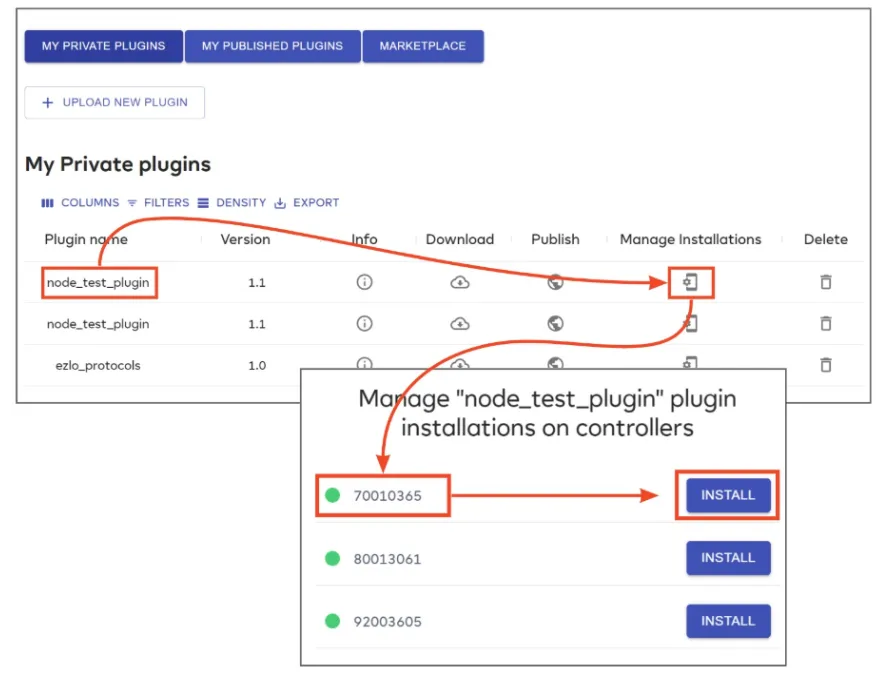
The plugin will appear in the list of plugins. Click the plugin’s ‘Manage Installations’ icon to install it.
After installing, go back and click the same ‘Manage Installations’ icon to configure the plugin:
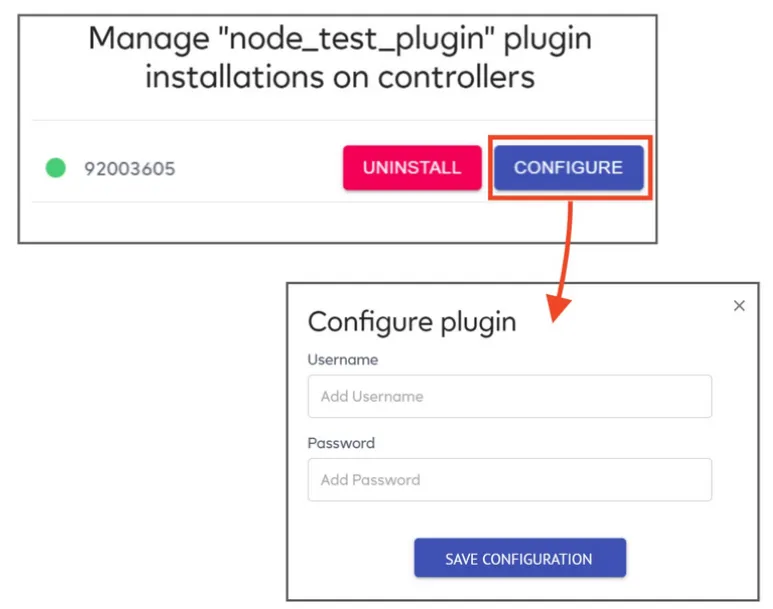
If everything went right, your plugin should now be functioning.
A minimal example plugin will be provided with this document. Feel free to install it, explore its codebase, and use it as a starting point for your own plugin.