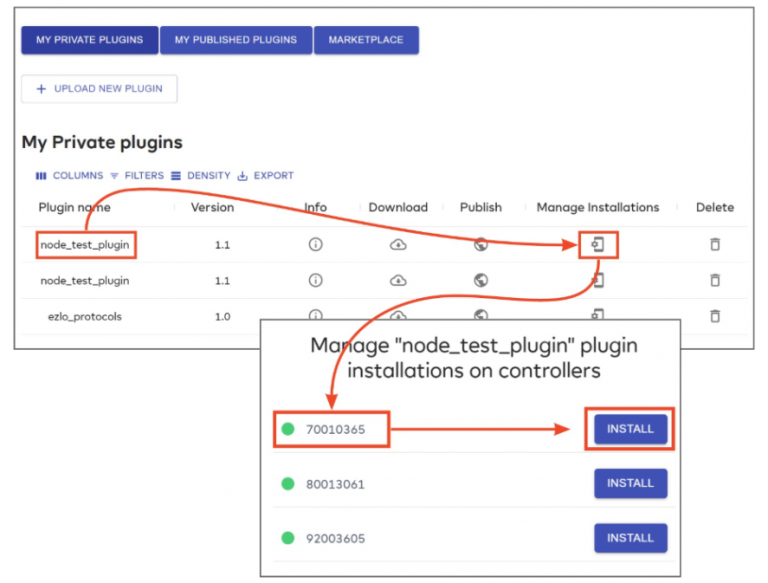
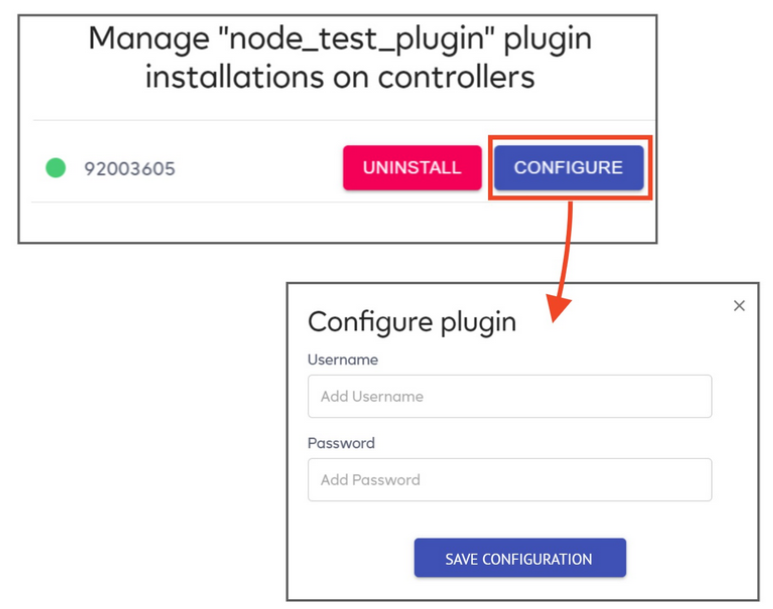
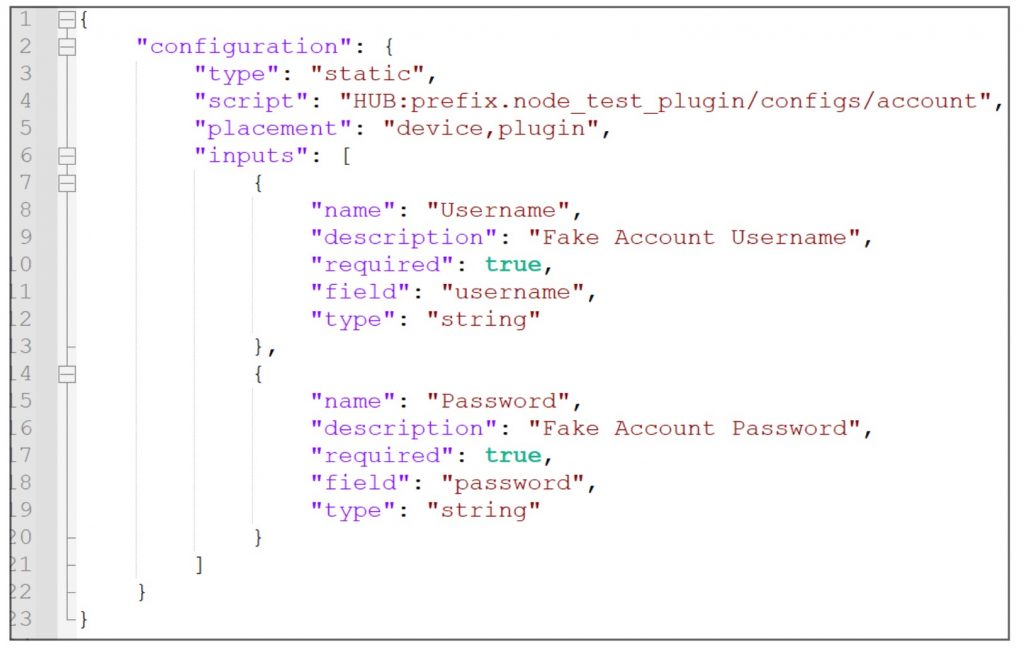
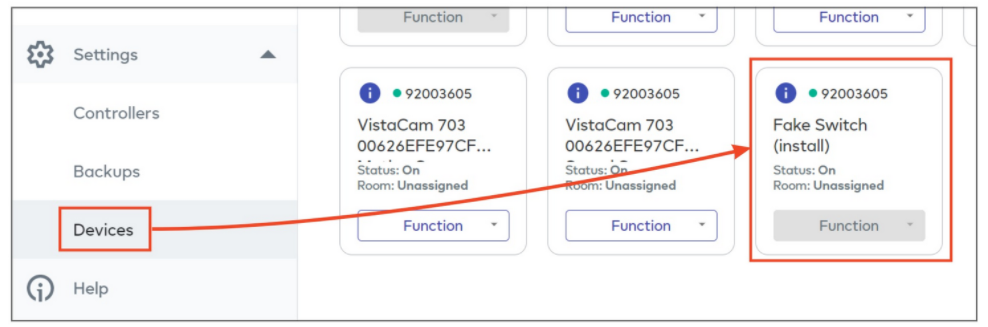
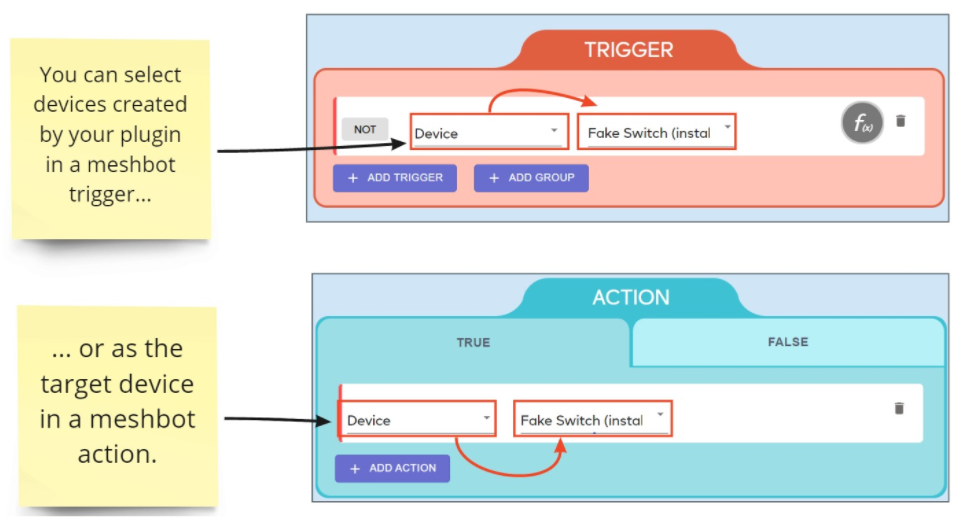
Install a Plugin Install your plugin Configure your plugin View and use your plugin devices Install a Plugin Upload your plugin to ‘My Private Plugins’ as explained here. Click the ‘Install’ icon in the row of the plugin you want to deploy. Select the controller on which you want to install your plugin. Click ‘Install’ to install it on your controller: Configure your plugin Go to ‘My Private Plugins’ then click the icon in the ‘Manage Installations’ column of the plugin you want to configure. If your plugin requires configuration information such as a username and password, then you can click ‘Configure’ to set these credentials: This allows you to save the authentication information required by your plugin. Note – the ‘Configure’ button is only relevant if you have added a “configuration” section to your interface.json file, as illustrated below: View and use your plugin devices Any new logical/virtual devices created by your plugin will be visible in the ‘Devices’ section of the EZLogic interface: You can now use the device in the ‘Node’ drop-down of a meshbot trigger, and the ‘Controllable’ part of a meshbot action: See triggers overview if you want more help with meshbot triggers. See actions overview if you want more help with meshbot actions.